I’m probably the last guy to give a serious tutorial on anything, photographic or otherwise. However, based on some recent conversations where I’ve been asked about it, I thought I would give a bit of a rundown on what infrared photography is along with some reasons I took it up and enjoy it. I’ll try to keep technical jargon to a minimum and leave that for folks who are, well, more technical.
It’s completely possible you could be scrolling through my images and come across something that looks “weird” or “not quite right.” Rather than green, perhaps the foliage is glowing bright white (or perhaps a really crazy pink or orange). Perhaps it’s summertime and I’m posting what appears to be a snowy landscape. Is your screen on the fritz? Did I absolutely come unhinged in Photoshop? No, your screen is probably fine and, while editing programs were likely involved, the processing was absolutely deliberate.
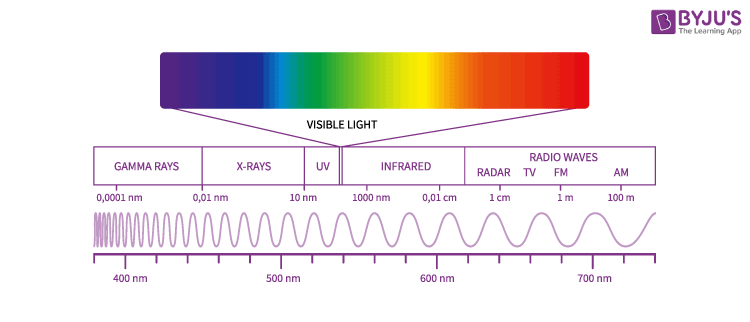
What is color? Simply put, it’s how our brains interpret different wavelengths of light as they bounce off surfaces and materials. These wavelengths are measured in nanometers (nm), and human eyes are only sensitive to a fairly narrow slice—roughly 380nm (violet) to about 750nm (deep red)—what we call “visible light.” Just beyond that red end of the spectrum sits infrared, wavelengths our eyes can’t detect but cameras absolutely can, with some persuasion.
When photographic film is produced, manufacturers design the film emulsion to only be sensitive to the desired range. In the vast majority of circumstances this is visible light, but film has been produced to capture ultraviolet and infrared energy as well. An early issue with the sensors in digital cameras was that the sensors were sensitive to a very wide range of energy from well below to well above what our eyes are sensitive to. Without modification this would produce images that appear vastly different from what would be visible to our naked eyes. Therefore, digital camera manufacturers must put extra filters on their sensors to block out the undesirable wavelengths so a more natural looking image is produced.
This is good news for those of us interested in exploring imagery outside the visible part of the EM spectrum. In the digital realm it is a relatively simple matter to remove these filters and replace them with clear glass or some other “cut” filter to target a specific portion of the spectrum. There are various companies who do these modifications at a fairly economical price point. I chose a company called LifePixel to modify an old Canon 6D for me and went with the clear glass or “full spectrum” modification. Without any additional filters this camera would now produce some “freaky” images indeed! However, by adding on-lens filters I now have the flexibility to “cut” EM energy at various points in the spectrum, making it a very versatile setup.
In my IR bag I currently carry four cut filters. The 590nm cuts everything below orange, letting through the visible reds and near-infrared—this is your false color territory. The 720nm lets just a sliver of deep red through alongside IR and has quickly become my favorite for reasons I’ll get into below. The 830nm is the most aggressive cut, allowing only pure infrared to hit the sensor—straight to black and white, no debate. And yes, I also carry a visible band pass filter that basically turns the camera back into a normal camera. It cost about half the modification price and I feel a little ridiculous every time I use it, but that’s some of that versatility I was talking about.
Why have I decided to shoot infrared? Well, the obvious reason would be it is another avenue for experimentation and artistic creation. It is also a bit unique and aids in standing out from the crowd, so to speak (not that there aren’t many other photographers embracing IR, especially in the digital realm). A very big reason for me is that it can extend a shooting day or at least get me out at times of the day I normally wouldn’t be inspired to do so. It’s widely known that early morning and late in the day are prime times for nature photography due to the flattering golden light our sun provides at those times. However, light that would normally be considered too harsh for traditional photography can be excellent for infrared photography due to the intense IR radiation hitting our planet during those times.
I’ll stop there as I’m not trying to write a textbook. How about some images?
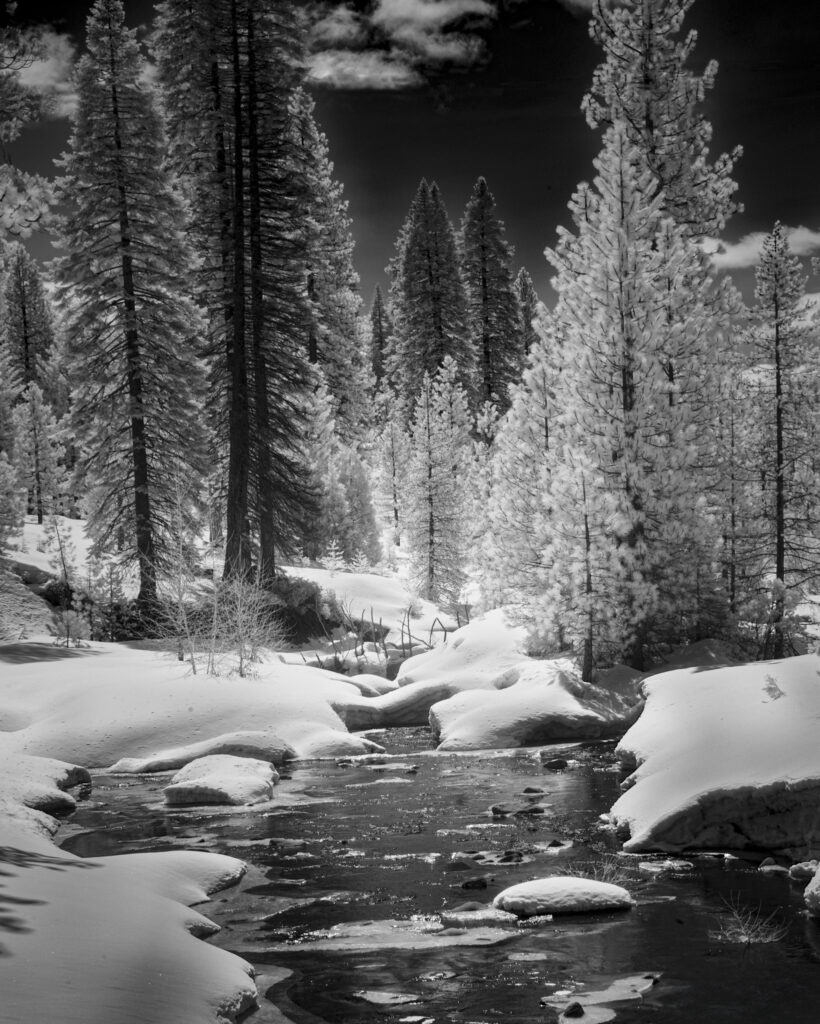
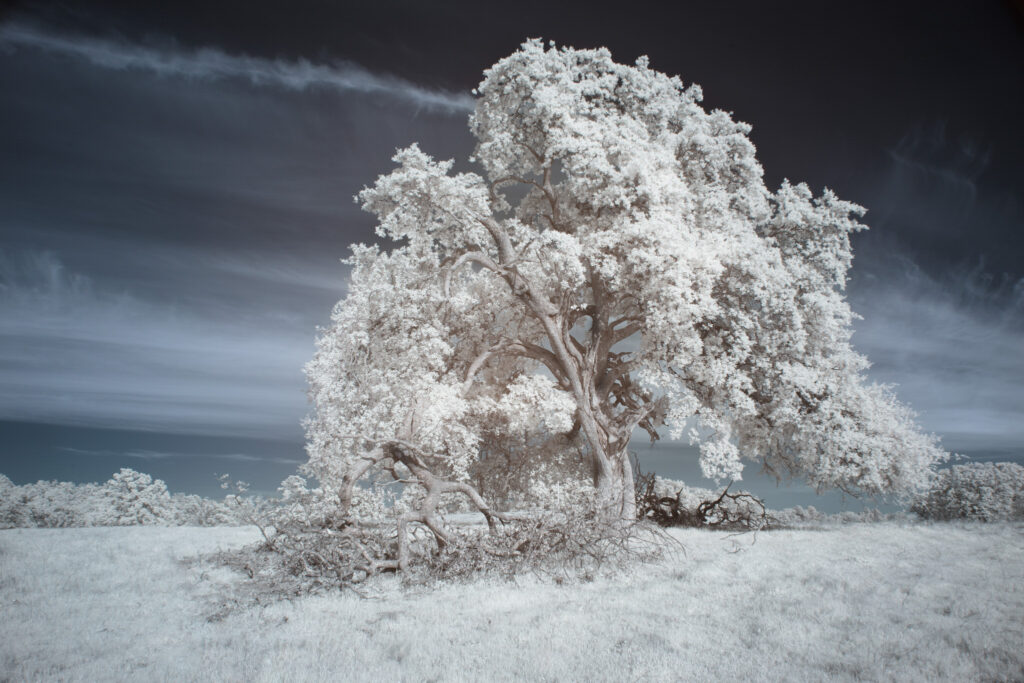
The image at the start of this post is of Bailey Creek in Plumas County, California. It was captured midday in early spring while there was still snow on the ground. I captured it with the 830nm filter so black and white was a given. As you can get a glimpse of in the image, shooting at this wavelength allows for producing a very dark sky and quite white clouds. This makes me think of the great Ansel Adams and his well known “zone system” every time I create an image like this (Adams did shoot some IR film although most of my research indicated he never really warmed up to it and preferred a traditional red filter—similar, but less intense results).
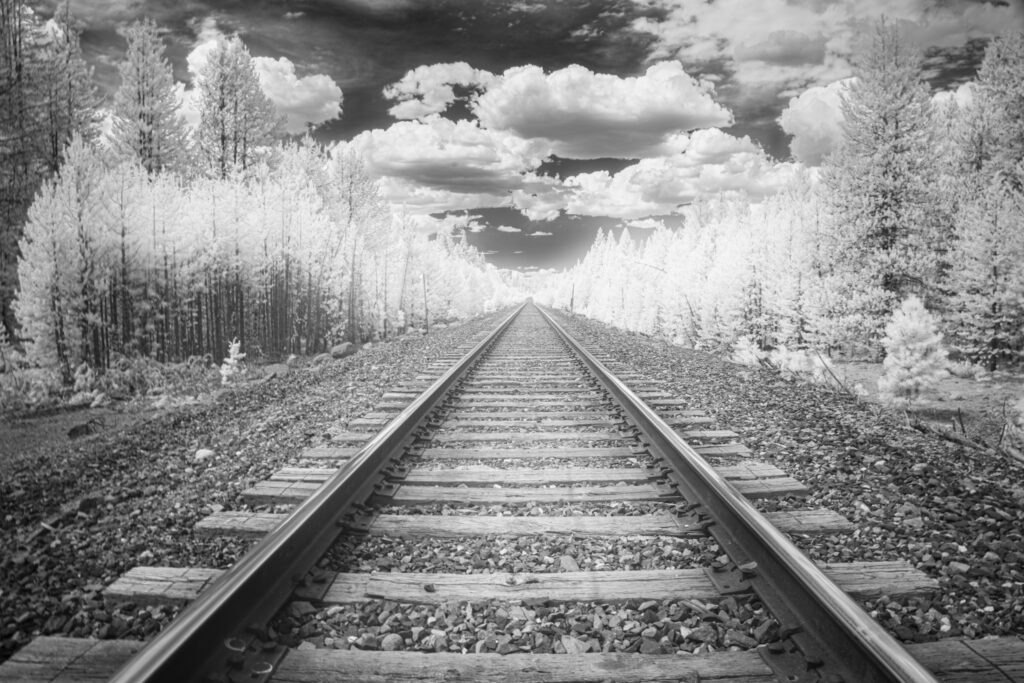
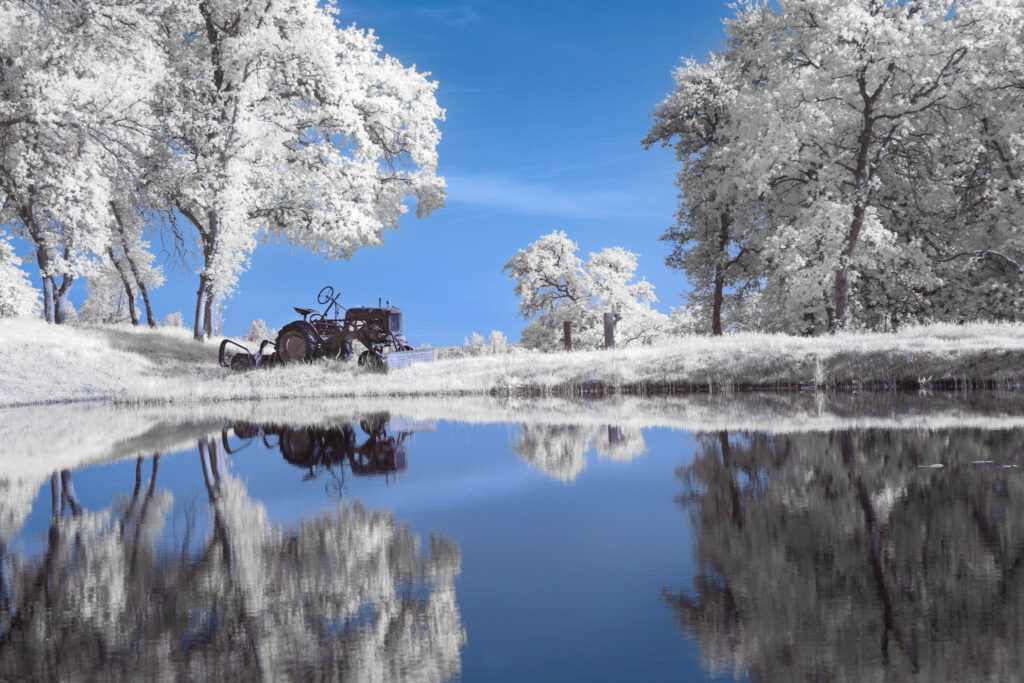
This image of some BNSF tracks here in Lassen County, California further demonstrates the dramatic skies that can be produced in black and white IR.
Here are a couple of images I captured with the 590nm filter. I grabbed this one during springtime as I was traveling through Artois, California when the almond orchards were in bloom.
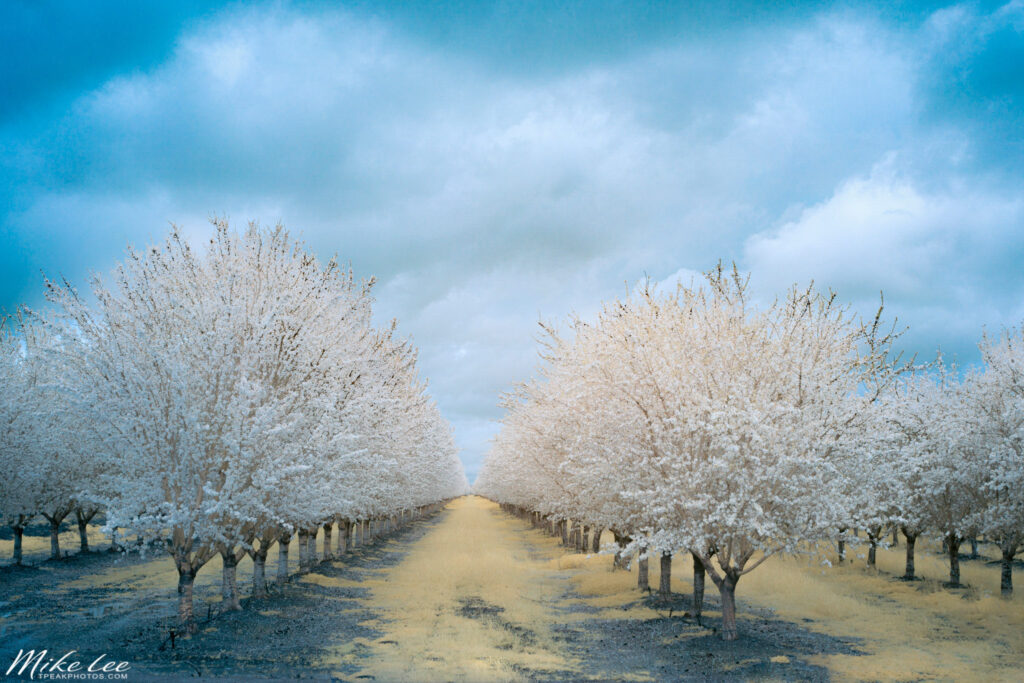
These “false color” images require some work in post production to achieve what you see above. As noted before, no actual color makes it to the camera sensor aside from reds. They come out of the camera looking like something from a post-apocalyptic dystopia…
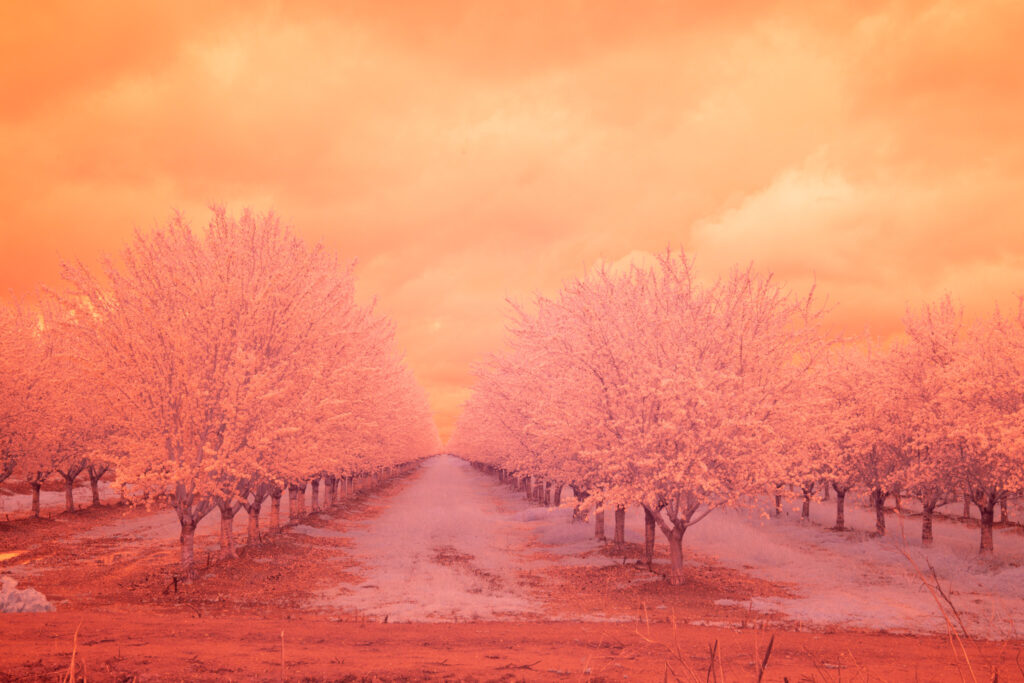
By swapping the red and blue color “channels” in post production software along with some other adjustments, we can make skies appear blue, which is almost always preferable to human viewers.
Here’s one more from the 590nm filter. Because IR will never look like a traditional photo and art is subjective, the artist has a great deal of latitude for creation. The only limits beyond those of the chosen wavelength are the artist’s imagination. I’ve titled this one Cotton Candy Cottonwoods as an early viewer thought the trees looked like cotton candy as a result of the pink tones I arrived at in post production (a bit “crazier” than I normally get).
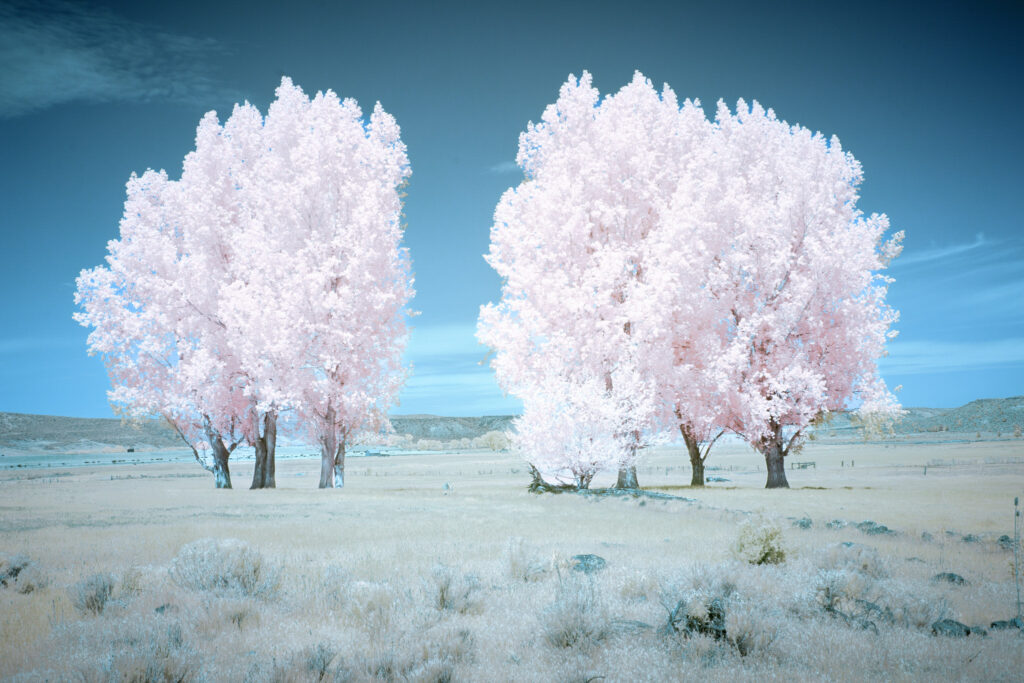
I haven’t had my 720nm filter as long as the other two but, as noted above, it’s quickly become my favorite. This wavelength is, far and away, the most common IR modification done to digital cameras and after just a short time shooting it, I certainly see why. At this point, you have eliminated enough visible “color” so strong black and white can be produced, but you’re leaving just enough to create wonderful ethereal and surreal false color by utilizing the channel swap method mentioned above. Foliage, especially deciduous foliage in spring, glows nearly bone white in the completed image against subdued overall tones (high chlorophyll levels in spring reflect IR energy very well).


Hopefully I haven’t gotten too long-winded and someone gets something out of this. For anyone considering exploring IR photography, I highly recommend Rob Shea’s YouTube channel. Mr. Shea is very talented in the craft and an excellent explainer.
Until next time!